|
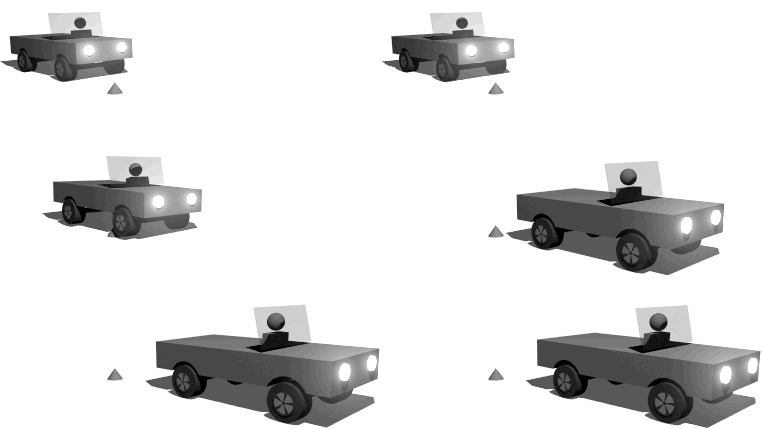
Hypergraph Window
The Hypergraph window is a visual representation of everything in your scene; the way they are grouped or parented and connected via history. Individual objects are represented by grey boxes called nodes.
Select Windows->General Editors->Hypergraph: Hierarchy
Use the Alt key to dolly or track the Hypergraph window.
Group Objects Together (Two Levels)
Select the objects you wish to be in one group.
Edit->Group will group together the selected objects forming a new node above them,
the new node pivot center is at 0 0 0.

Animate Objects in a Hierarchy
Klennex® Box Truck Tutorial
Wheels
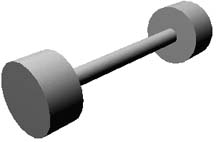
In the Modeling Module:

Select Create->Polygon Primitives->Cylinder->
Input Radius: 1
Input Height divisions: 1
Input Cap divisions: 0
Select Axis: Z
Click Create
Scale it down in Z a bit to make it look more like a wheel.
Move the wheel +3 units in the Z axis.
Use Edit->Duplicate Special->
Translate a copy -6 units in the Z axis
Make another copy and scale it down for the axil.
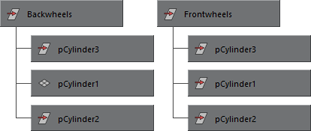
Select all 3 parts, use Edit->Group to group them together
In Windows-> General Editors-> Hypergraph: Hierarchy, name the group Backwheels
Make a copy of the group, translate the copy 6 units down the X axis.
In Windows-> General Editors-> Hypergraph: Hierarchy, name the group Frontwheels
Body and the windshield
Use a primitive polygon cube for the body, scale it and position it above the wheels.
Use a primitive polygon cube for the windshield,
scale, rotate and position the windshield above the truck.
Using the Select by Hierarchy button  select all the parts of the truck. select all the parts of the truck.
Use Edit->Group to group them together.
Use the move tool with the d key to move the pivot to the center of the front wheel.
(We will be poppin'' some wheelies later.)
Open the Windows-> General Editors-> Hypergraph: Hierarchy
to look at the grouping so far.
Double click on the truckgroup to change the name to group_to_rotate_back.
Tricky part: Edit->Group the truck one more time. This will add an extra pivot point for animation later.
The pivot for the top group should be at the rear wheel. If your pivot is not located at the rear wheel, use the move tool with the d key to adjust the pivot.
Name this group truck in the hypergraph.
Adjust the pivot for the second group down to the front wheel.
Name this group group_to_rotate in the hypergraph.
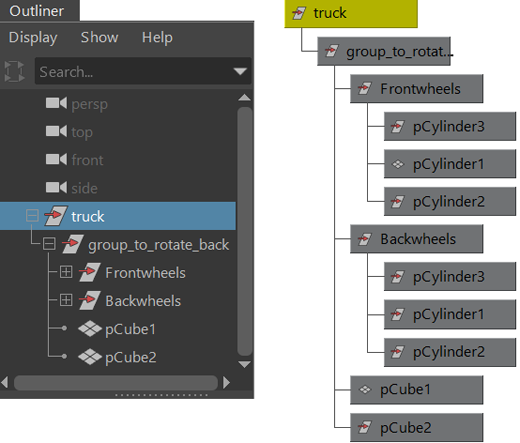
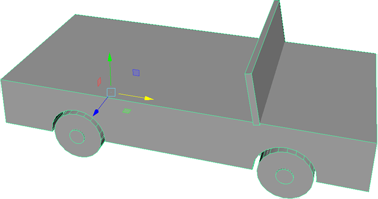
Use the Hypergraph to Select the truck group, (the top of the hierarchy) move the truck up 1 unit in the Y axis, so the bottom of the wheels are hitting the ground.
Move the truck back -15 units in the X axis. We are ready for frame 1.
Place a cone in the road, the truck will run over. Scale it 50%, and line it up under a tire.
Maya options for animation
Move the time slider over to frame 1 at the bottom of the screen.

Change 24 fps to 30 fps over to the right on the time slider.

Set Keyframe 1
Set the maximum playback on the time slider to 60, this is the box way over to the right on the time slider.
Use the Hypergraph to select the truck group.
Move the time slider over to frame 1 at the bottom of the screen.

Highlight Translate X in the Channel Box.
Use the right mouse key over the the channel name, choose Key Selected.
Set Keyframe 60
Move the time slider over to frame 60.
Move the truck to +15 units in the X axis.
Use the right mouse key over the the channel name in the channel box (Translate X), choose Key Selected.
Pop the first wheelie
Move the time slider to the right until the truck just hits the cone in the road.
Use the Hypergraph to select the truck.
Highlight Rotate Z in the Channel Box.
Use the right mouse key over the the channel names, choose Key Selected.
Move the time slider over a little more until the truck's front wheel is centered over the cone.
Rotate the truck in the Z axis to pop the wheelie. (It should rotate around the pivot near the back wheel.
Use the right mouse key over the channel name, choose Key Selected.
Move the time slider over a little more until the truck's front wheel clears the cone.
Rotate the truck back to 0 in the Z axis.
Use the right mouse key over the the channel names (rotate Z) in the channel box, choose Key Selected.
Pop the second wheelie:
Move the time slider over until the truck just hits the cone in the road with the back wheel.
Use the Hypergraph to select the group below which you named group_to_rotate_back.
Highlight Rotate Z in the Channel Box.
Use the right mouse key over the the channel name, choose Key Selected.
Move the time slider over a little more until the truck's back wheel is centered over the cone.
Rotate the truck in the Z axis to pop the wheelie. It should be rotating around the pivot near the front wheel.
Use the right mouse key over the the channel names (rotate Z) in the channel box, choose Key Selected.
Move the time slider over a little more until the truck's back wheel clears the cone.
Rotate the truck back to 0 in the Z axis.
Use the right mouse key over the the channel names (rotate Z) in the channel box, choose Key Selected.
Of course it is more fun if you make the truck bounce a bit.
Use Expressions to animate the wheel groups turning
Use the Hypergraph to select the Backwheels group.
Highlight Rotate Z in the Channel Box
Select Edit->Expressions... from the Channel box menu
Type: rz = truck.tx / (2 * 3.1416) * -360 in the lower section of the expression editor (pi)
Hit Edit or create
Do the same for the front wheels.

|