|
Setup the Render View
In the persp window
Select View->Camera Settings->Resolution Gate
Uncheck View->Camera Settings->Gate Mask
This will let you see how the image will be cropped.
Click the Render View icon upper right 
Click the Start IPR icon 
Arnold Lights
Many of these lights work with the Arnold renderer only.
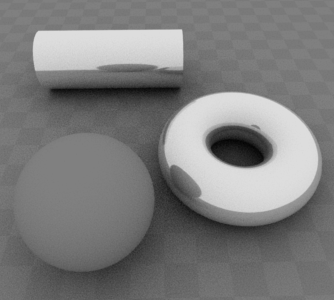
Select Arnold->Lights->Skydome Light (not Maya Software Render, not Unity)
Use this light to add a background color and ambiance.
Typically the Color will be dark gray.
Keep Intensity 1 and Exposure 0
Change Samples to 2 (default 1, less grainy)
Uncheck Cast Volumetric Shadow
Under Visibility set Camera to 0 if you don't want to see the sky in your render.
(This keeps the background and the alpha channel transparent.)
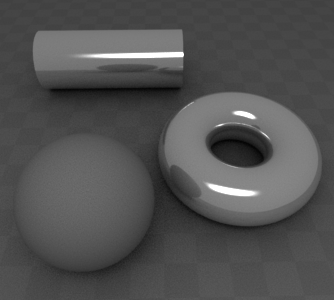
Select Arnold->Lights->Area Light (yes Maya Software Render, not Unity)
This light can be scaled to change the sharpness of the shadow and shape of the highlight.
This light needs to point at the scene, you may need to rotate and position it.
Set the Intensity to 1
Adjust the Exposure to 8
Set Soft Edge to 1 to improve the edge quality of the shadow. (default 0)
Set Spread lower, the cone of light becomes smaller and brighter. (default 1)
Set Samples to 2 for less grain. (default 1)
This image is a combination of Ai AreaLight and Ai Skydome Light. Notice the rectangular shape of the area light reflects on the shiny objects. The shadows are very soft, as a result, this light uses more rendering time.
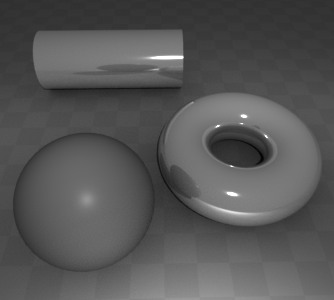
Select Arnold->Lights->Photometric Light (not Maya Software Render, not Unity)
Photometric lights use data measured from real-world lights.
Download IES profiles directly from light manufacturers.
This image is a combination of Ai Photometric Light and Ai Skydome Light.
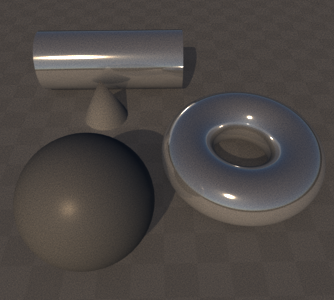
Select Arnold->Lights->Physical Sky (not Maya Software Render, not Unity)
This light simulates a physical sky and sun.
In the Attribute Editor, set Exposure to 1 or more.
Under Visibility set Camera to 0
This keeps the background and the alpha channel transparent.
Under the aiPhysicalSky1 tab
Change the Elevation for the sun rise/set.
Change Azimuth for the position of the sun.
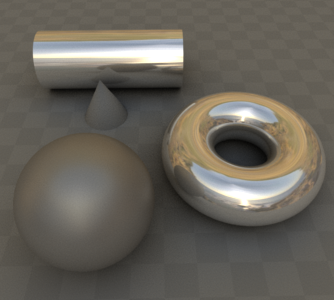
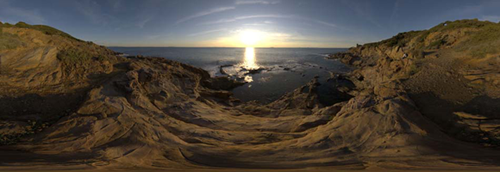
Select Arnold->Lights->Skydome Light with an HDR Image map
(not Maya Software Render, not Unity)
You can add an HDR image map.
Click on the map icon  across from Color across from Color
Click on File
Select an image (you can use the image above)
In the Attribute Editor set Exposure to 1
Under Visibility set Camera to 0
This keeps the background and the alpha channel transparent.
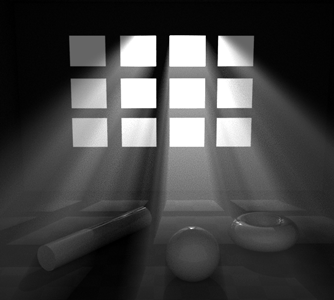
This image is a combination of a Spot Light and Ai Skydome Light.
Fog with Spot Lights
Select Create->Lights->Spot Light (yes Arnold, Maya Software Render and Unity)
Select your spot light in the perspective view
Select Panels->Look through Selected
Dolly and track the view to look at your objects.
This will aim the light at the objects in your scene.
Use Panels->Perspective->persp to bring the view window back.
Or Panels->Orthographic->Top etc.
Select the light and use Display->Show->Light Manipulators to turn on controls.
(Display->Hide->Light Manipulators to hide)
Click the circle with a line to switch between manipulators.
Use your mouse to drag the end of the cone longer.
This area determines the shape and size of the fog.
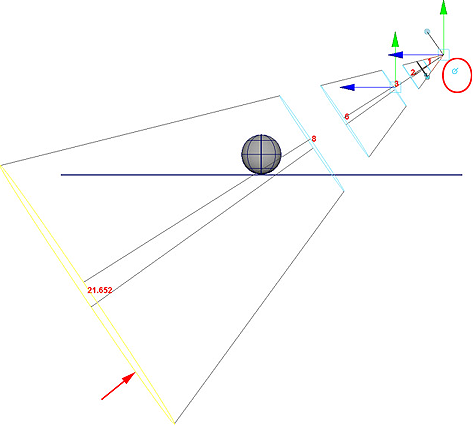
Hit 7 in the Persp view to see the light rendered.
In the Attribute Editor
Input a negative Penumbra Angle -.4 (softness around the edge of the spot)
Play with the Cone Angle
Under the Arnold drop-down
Set Exposure to 8 to start
Select Cast Volumetric Shadows
Under the Light Filters drop-down
click on Add
Select Gobo and click Add
Open the aiGobo tab in the Attribute Editor
Set Filter Mode to mix
Set the Density to 1 and then adjust later after you render
Open the Render Settings 
Under the Arnold Renderer tab
Open Environment
Select the  icon to the right of Atmosphere icon to the right of Atmosphere
Choose Create aiAtmosphereVolume
In the Attribute Editor
Input Density .02 and then adjust later after you render
Render Settings
Press this icon upper right or middle 
Under the Arnold Renderer tab:
Under the Sampling arrow:
Set Camera (AA) to 3 (default 3) (cuts down on grain)
Set Diffuse to 4 (default 2) (cuts down on grain)
Set Specular to 1 (default 2)
Set Transmission to 0 (default 2)
Set SSS to 2 (default 2)
Set Volume Indirect to 2 (default 2)
Under the Ray Depth arrow
Set Total to 1 (default 10)
Set Diffuse to 1 (default 1)
Set Specular to 1 (default 1)
Set Transmisssion to 0 (default 8)
Set Volume to 1 (default 0)
Set Transparency Depth to 0 (default 10)
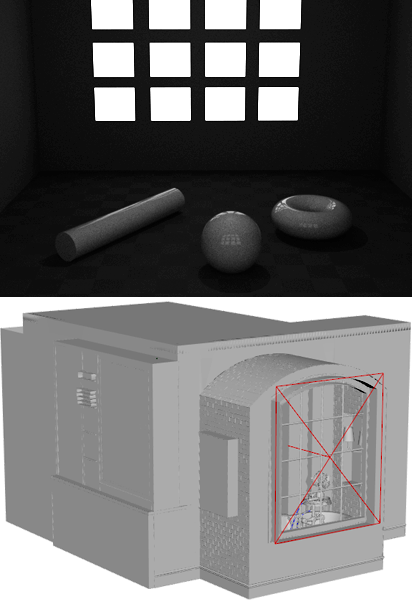
This image is a combination of a Light Portal and Skydome Light.
Select Arnold->Lights->Light Portal
Skydome lights can use light portals to reduce the amount of light spread for interior scenes, consentrating the light coming in through openings. Instead of emitting light, they can be used to guide skydome light sampling.
Light portals must be placed to cover all windows, doors and other openings through which skydome light comes into the scene.
Place the Light Portals so that it covers the entire window and points inwards.
Select Arnold->Lights->SkyDome Light
Glow or Bloom post process effect
(not Maya Software Render, not Unity)
Create a scene with an object with some emission in the shader.
Make sure to have some lights.
Open the Render Settings 
Under the Arnold Renderer tab
Open Imagers
Select Add Imager
Select Lens Effects
In the Attribute Editor
Enable should be selected
Change Bloom Strength to 2
Render Settings
Press this icon upper right or middle 
Under the Common tab:
Under the File Output arrow:
Choose Image format: Tif
Uncheck Dither
With these settings below, your scene will render faster with a preview quality.
Under the Arnold Renderer tab:
Under the Sampling arrow:
Set Camera (AA) to 2 (default 3)
Set Diffuse to 2 (default 2)
Set Specular to 1 (default 2)
Set Transmission to 0 (default 2)
Set SSS to 0 (default 2)
Set Volume Indirect to 0 (default 2)
Under the Ray Depth arrow
Set Total to 1 (default 10)
Set Diffuse to 1 (default 1)
Set Specular to 1 (default 1)
Set Transmisssion to 0 (default 8)
Set Volume to 0 (default 0)
Set Transparency Depth to 0 (default 10)
Click Close to close the window
Maya and Unity Lights
Most of these lights work with Maya Software Render, Arnold and Unity.
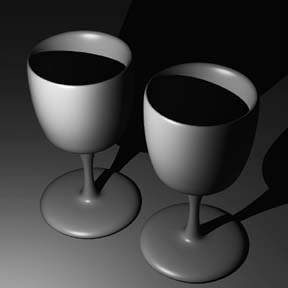
Select Create->Lights->Point Light (yes Arnold, yes Maya Software Render and Unity)
This light is like a light bulb, it points in all directions. A good default intensity is 1.2
When rendering with Arnold, you will be happier with a small Arnold Area Light, BUG the point light creates many grainy artifacts when inside an enclosed area.
Under the Arnold
Change the Exposure to 6+
Change Samples to 2+ (default 1)
Change Radius to 10 This softens the shadows. (default 0)
Turn off Cast Volumetric Shadows
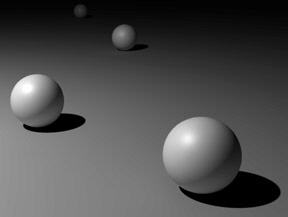
Linear Decay
(This decay works with Mental Ray and Maya Software render, not Arnold)
In the attribute editor for the point light, select Decay Rate->Linear
Use Create->Measure Tools->Distance Tool to measure the distance between the light and the object you would like illuminated.
Use this value for the Lights Intensity, you can input a value above the slider.
Play with Quadratic, you will need to turn up the intensity to over 100.
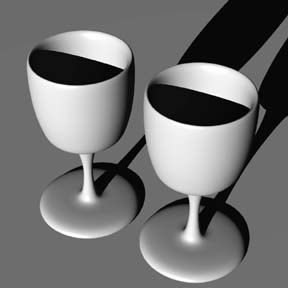
Select Create->Lights->Directional Light (yes Arnold, yes Maya Software Render and Unity)
This light will work in Unity. None of the other lights work in Unity.
This light has no attenuation, it similar to our sun. Everything in the scene is illuminated equally.
Set the intensity of this light at 1.2 units.
Use rotate to change the direction of the light.
The location of the light does not matter as it does not change the shadows or highlights.
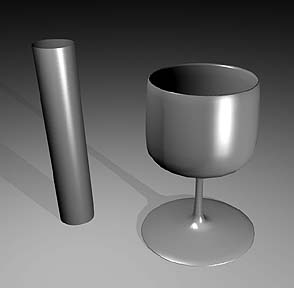
Select Create->Lights->Area Light (yes Arnold, yes Maya Software Render and Unity)
This light can be scaled to change the shape of the light. Notice the long rectangular highlights. Set the Intensity of this light to 1.2. You will to change the intensity of you scale this light.
If raytraced this light can produce soft shadows, this can take a long time to render.
When rendering with Arnold: under the Arnold drop-down change the Exposure to 6.
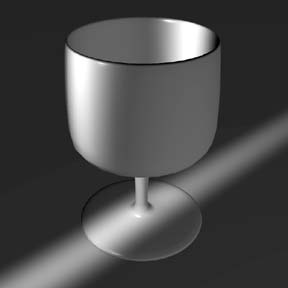 r r
Select Create->Lights->Volume Light (not Unity)
(Works with Maya Software Render and Mental Ray, not Arnold )
This light can be scaled to change the shape of the light. Object must be inside the light to be illuminated.
Notice the beam of light, this was created with a box shaped area light, squished in the Z axis.
Maya Software Render (Not Arnold)
Maya software render is slower with newer computers, it does not utilize the new processors and graphics cards. (Maya Renderer can actually be faster with old processors.)
Raytraced Shadows
Open Windows->Rendering Editors->Render Settings... 
Under Maya Software tab:
Under Raytracing Quality
Check Raytracing
Input Shadows 2
Input Bias .2 This will make round objects look less jaggy.
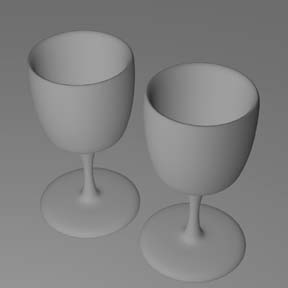
Select Create->Lights->Ambient Light (Maya Software Render only, not Arnold, not Unity)
(Works with Mental Ray and Maya Software render, not Arnold )
This light works well as a fill light. It helps illuminate dark shadow areas that can tend to make an object flat.
No highlights. Avoid using this light as the key light, it tends to be very low contrast. The default settings are bad, set the color to a dark gray.
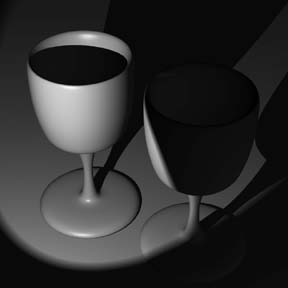
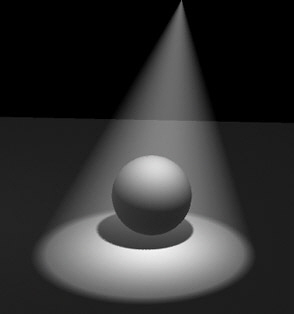
Select Create->Lights->Spot Light (yes Maya Software Render and Unity)
This light creates a cone of light, notice the ring of light on the ground. Leave the intensity of this light at 1 unit.
When rendering with Arnold: under the Arnold drop-down change the Exposure to 6.

Fog with Spot Lights (not Unity)
(Works with Mental Ray, use the gobo above procedure for Arnold )
Select your spot light. In the perspective window, select Panels->Look through Selected.
Dolly and track the view to look at your objects. This will aim the light at the objects in your scene.
Use Panels->Perspective->Persp to bring the window back.
Select the light and use Display->Show->Light Manipulators to turn on controls.
Use your mouse to drag the end of the cone longer.
Click the circle with a line to switch between manipulators.
In the Attribute Editor
Input a negative Penumbra Angle.
Input Dropoff 10
Under Light Effects, click the map button  next to Light Fog. next to Light Fog.
Under Shadows, under Raytrace Shadow Attributes
Select Use Ray Trace Shadows
Input Light radius .15 for soft shadows
Input Shadow rays 40, to fix speckels

|