|
Install plug-in, if you do not see Mental Ray options
Download the plugin from:
https://forum.nvidia-arc.com/showthread.php?16283-Now-Available-Mental-Ray-for-Maya-2018
Keep in mind that Autodesk did not develop Mental Ray; it is a plug-in for Maya, so you may have to enable it in the Plug-in Manager before you can see it as an option in your Render Settings window.
To enable the plug-in: Window>Settings/Preferences>Plug-in Manager
Check both the Loaded box and the Auto Load box next to Mayatomr.mll
Final Gather
Final gather is a method of simulating global illumination.
In the Perspective view use View->Camera Attribute Editor...
Under Environment
Change the black Background Color to a lighter color. The background will be used to generate ambient light when you select final gather
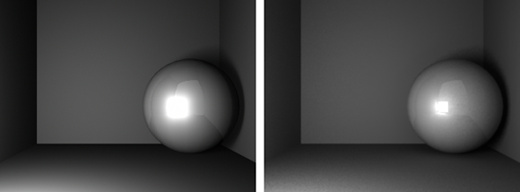
Create 5 sided cube (Create NURBS Primitives->Cube, delete 1 side)
Create a sphere
Apply material - Blinn or play with the Mental Ray shaders
Open Windows->Rendering Editors->Render Settings or press 
Under the Common Tab: down at the bottom: Render Options
Uncheck Enable default lights You will render with light reflected from background.
Choose Render using mental ray (top of Render Settings)
Select the Quality tab
Select Sampling-> Indirect Diffuse (GI) Mode-> Finalgather
Render an image
Lights
Try adding a Mental Ray light:
There are additional 4 lights that work with Mental Ray (not Maya Software render):
1) Select an object to be used as a light, Create->Lights->Object Light
2) Create->Lights->Physical Area Light This light shows up as an object.
3) Create->Lights->Physical Sun
Rotate to orient, 0 degrees = no light, -90 degrees noon
4) Create->Lights->Environmental Sky
Change settings under View->Camera Attribute Editor...
for the Persp window. mia_physicalsky1 tab, You can turn this off.
5) Create->Lights->Environmental Image (IBL)
Search google for image based lighting images,
Look under lights in the Hypershade to edit. This will shade your object.
You can hide the object, look under render Stats, uncheck Primary Visibility.
Maya Lights:
Create a light with shadows, under the light's attributes select:
Shadows->Raytrace Shadow Attributes
check Use Ray Trace Shadow
Light Angle .4 (soft shadows)
Shadow Rays 40 or more (gets rid of grain, higher than slider)
Ray Depth Limit 1, higher if you need to see shadows in reflections.
Get Rid of the Speckels
Open Windows->Rendering Editors->Render Settings or press 
Scene tab
Under Cameras->Environment
Uncheck Emit Environment Light
Presets:
Open Windows->Rendering Editors->Render Settings or press 
Top menu Presets->Load Presets
Default
Overall Quality .25
Lighting Quality 1
Indirect Diffuse (GI) Mode off
(MILA) Material Quality 1
Filter Gauss
Filter Size 3, 3
Reflection 4
Transmission 4
Max Trace Depth 6
FinalFrameEXR
Overall Quality 1.5
Lighting Quality 1
Indirect Diffuse (GI) Mode off
(MILA) Material Quality 1
Filter Gauss
Filter Size 2, 2
Reflection 4
Transmission 6
Max Trace Depth 10
** Preview Save rendering time
Overall Quality .01
Lighting Quality 1
Indirect Diffuse (GI) Mode off
(MILA) Material Quality 1
Filter Box
Filter Size 1, 1
Reflection 4
Transmission 4
Max Trace Depth 6
Production
Overall Quality .6
Lighting Quality 1
Indirect Diffuse (GI) Mode off
(MILA) Material Quality 1
Filter Gauss
Filter Size 2, 2
Reflection 4
Transmission 6
Max Trace Depth 10
Here are a few great guides for Mental Ray specific shader settings:
http://www.nvidia-arc.com/fileadmin/user_upload/PDF/arch_and_design.pdf
http://docs.autodesk.com/MENTALRAY/2015/ENU/mental-ray-help/files/shaders/architectural/arch_mtl.html
|
