|
Path Animation
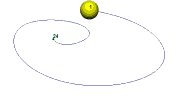
Any object including lights deformers and cameras may be animated along a path.
Set up your options for animation:
Move the time slider over to frame 1 at the bottom of the screen.

Change 24 fps to 30 fps over to the right on the time slider.

Draw the Path
Draw a curve in any view. Create->Curve Tools->CV Curve Tool
Create an object such as a sphere to animate along the path. The object moves along the path from the pivot center.

Set the maximum playback on the time slider to 300, over to the right on the time slider.
Select the sphere and then Shift select the path.
Switch the Menu Set to Animation in the top left corner of the Maya window

Choose Constrain->Motion Paths->Attach to Motion Path
Look at the keys in the Graph Editor
Select the sphere
Open Windows->Animation Editors->Graph Editor
Select View->Frame All
Preview the animation:
Hit the play arrow on the time slider. 
Bake the Animation for Unity etc
Select the object with animation.
Choose Key->Bake Simulation
The default settings will create keys for rotation, translation and scaling for every frame, using the time slider.
Also Select Edit->Delete by Type->Static Channels to clean up extra unused channels
Save your model.
Train on a Track Example for Unity
This is a workaround since Path animation is limited, it does not work with Infinity Cycle with Offset.
Use a Nurbs Circle for the path.
Create->NURBS Primitives->Circle
Scale to 4
Use as many Cubes as you like for the train cars.
Select all the Cubes and use Shift to select the curve after.
Choose Constrain->Motion Paths->Attach to Motion Path
Open Windows->Animation Editors->Graph Editor
Make all the Curves Linear Tangents 
Choose Key->Bake Simulation for all the selected Cubes.
Select Edit->Delete by Type->Static Channels to clean up extra unused channels
Open Windows->Animation Editors->Graph Editor
Select all the curves or keyframes
Select Curves->Pre Infinity Cycle with Offset
Select Curves->Post Infinity Cycle with Offset
Select View->Infinity
Select all the Cubes except for the first Cube
Select all the Keyframes in the Graph Editor
Use the Shift and Move Tool and slide all the channels to the right in time 
The Cubes will be behind the first Car in time.
Select Cubes 3+ and offset the time again. etc
If the file is going into Unity:
Do this because Unity does not recognize Infinity Cycle with Offset.
Select all the Cubes.
Choose Key->Bake Simulation for all the selected Cubes.
Select Edit->Delete by Type->Static Channels

.
|
