|
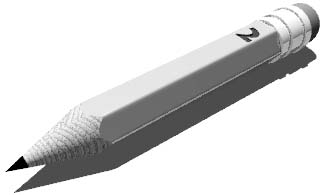
Pencil Trim Tutorial
Pencil Body
In the Modeling module

Choose Create NURBS Primitives->Cylinder->
Select Axis Z
Input Height 12
Input Number of Sections 18
Select Caps none
Click on Create
Hit 4 to view the Front View as wireframe.
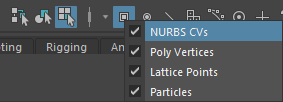
Left Mouse choose the Select By Component Type button 
Right Mouse choose point components 
NURBS CVs should be selected.
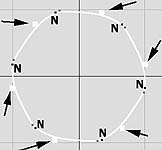
From the front view, hold down the Shift key and draw a box to pick every third CV around the circular part of the cylinder.
Select the Rotate Tool button from the side tool box. Interactively rotate the active CVs counter clockwise until they are close to the neighboring CV. 
Click the background of any view to select nothing.
Hold down the Shift key and draw a box to Select every third CVs. (see arrows on diagram)
 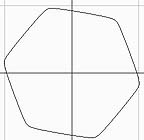
Select the Rotate Tool and interactively rotate the active CVs clockwise until they are close to the neighboring CV. 
Pencil Tip
Select Create->NURBS Primitives->Cone->
Select Axis Z
Input Radius 1.2
Input Height 4.8
Input Number of Sections 6
Click on Create
Select the select by object type button. 
Select the Move Tool button. 
Move the cone down the Z axis so it intersects the pencil body closer to the tip.
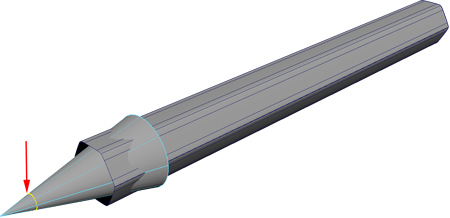
Use detach to cut a pencil tip
This will save a lot of polygons compared to using trim.
In object type mode, select the cone. 
Move the mouse over the cone, hold down the right mouse button to bring up the object mini menu, select isoparm. Click and drag on the end isoparm to select the ring and move it to where you want the tip.
Select Surfaces->Detach
Intersect the Pencil Body and the Cone
Select both the pencil body and the cone.
Use Surfaces->Intersect->
Input Tolerance: .0001
Curves on surface are created on both surfaces.
Select the pencil body
Use Surfaces->Trim Tool
Click the region you wish to keep, Select towards the back, a marker will appear.
Hit Enter
Trim will hide the front.
Repeat this for the cone.
Eraser and Barrel
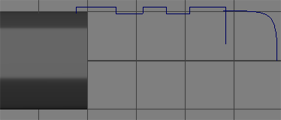
Create a Linear curve and use Surfaces->Revolve around the Z axis to create the eraser barrel. (Create->CV Curve Tool-> , select Linear) , select Linear)
Create a Cubic curve and use Surfaces->Revolve to create the eraser.
Convert the NURBS shapes to polygons for Unity
Select all the NURBS surfaces
Select Modify->Convert NURBS to Polygons->
Choose Quads
Choose Tessellation method: General
Change U type to: Per span # of iso params
Change V type to: Per span # of iso params
Input Number U: 3 (If this is too jaggy, increase)
Input Number V: 1
Hit Apply
Use the Move Tool  to move the converted polygon obects over. to move the converted polygon obects over.
Fix the barrel, eraser and tip
You can individually select the items such as the barrel to change the divisions to 1 along the straight axis.
Select an object
Channel editor
Open nurbsTesselate
set U Number
set V Number
Delete the NURBS surfaces, or export them into another file, then delete.
Shaders
Create 4-5 Lambert Shaders, assign the parts of the pencil. Use a wood image as a color map, save it into your Unity Assets folder, access the maya texture from the Unity folder.
Select all the Polys and choose Edit->Group to group everything together.
Edges
Fix the edge of the barrel:
Double click the sharp edges of the barrel (peach colored)
Use Mesh Display->Harden Edge
Combine
Select all the polys and use Mesh->Combine to make 1 poly mesh.
Use Edit->Delete by Type History
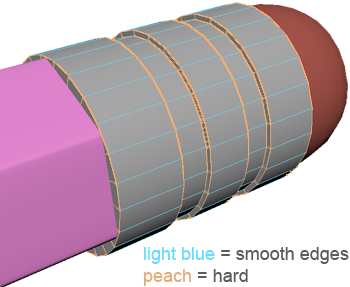
Create Shiny Materials in Unity
In Unity:
Assets-Create->Material
Drag and drop onto your various pencil parts
Another Trim Method to try, Project
In Maya:
Perhaps the best analogy for the projection trim would be the cookie cutter and cookie dough. The cutter is projected into the dough (object) in order to produce the desired form.
In Maya:
Place a sphere in the scene. Scale it up a bit.
Draw a closed curve in the front window that will be our cookie cutter shape. This curve should overlap the sphere.
Select the sphere and the curve from the front window, this will designate the front view as the axis to project along.
Use Surfaces->Project Curve on Surface
A couple of curves on surface were created on the sphere.
Click the sphere
Use Surfaces->Trim Tool
Click the region you wish to keep. Trim will hide the rest.
Hit Enter
Things to try: Try this with more than one projecting curve. Compare open curves versus closed. Project down different axes by Selecting different views before projecting. Try moving the projecting curve after trimming. The trim hole will update or change as you move the curve around.
*** Warning: Trim's history uses a lot of calculation, use Edit->Delete by Type->History to clear this up.
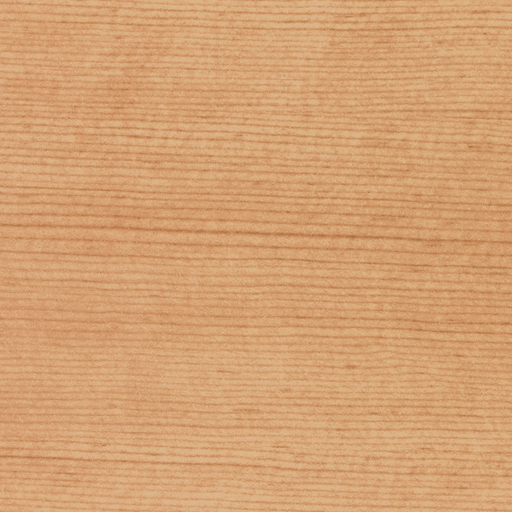
wood normal map

|