|

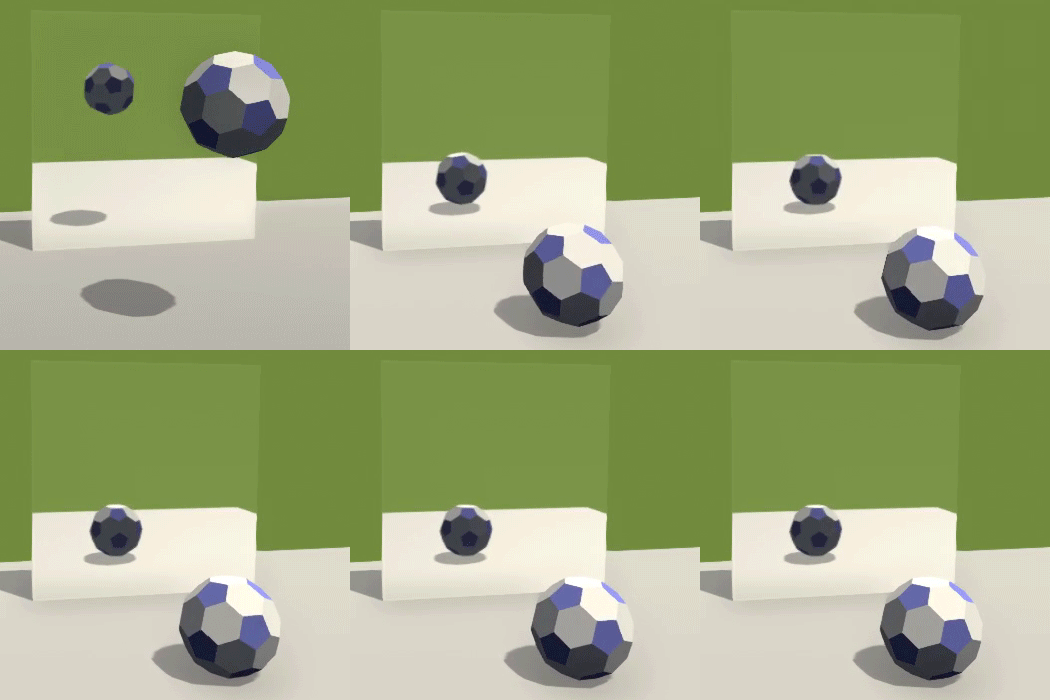
Example using Magic Mirror reflection
Tutorial to create an animated bouncing ball using legacy dynamics, bake the animation, then import into Unity. Ncloth dynamics does not port motion into Unity because the shape of the cloth changes with every frame. Legacy dynamics do not change their shape making it easier to port into Unity.
In Maya:
Select Create->Polygon Primitives->Soccer Ball
Move the ball above the Y axis
Add Legacy dynamics
Switch to the FX Module

Select the ball
Choose Fields/Solvers->Create Active Rigid Body
In the Channel Editor, input Initial Spin X 1 (Ncloth does not have this feature.)
Add gravity
Select the ball
Choose Fields/Solvers->Gravity
Add a ground object
Create Polygon Primitives->Plane
Scale it up a bit
Select the plane
Choose Fields/Solvers->Create Passive Rigid Body
Hit the play arrow on the time slider. 
You may need to make the Time Slider animation End Time longer. Unity uses the Time Slider to determine the length of the animation.
Bake the Simulation for Unity etc
Switch the Menu to Animation in the top left corner of the Maya window

Select the ball.
Choose Edit->Keys->Bake Simulation
The default settings will create keys for rotation and translation for every frame, using the time slider.
Select Edit->Delete by Type->Rigid Bodies
Select Edit->Delete by Type->Static Channels to clean up extra unused channels
Delete the Plane, and the gravityField
In Unity:
Add your Maya File to your scene
Select the Maya file in the Assets list
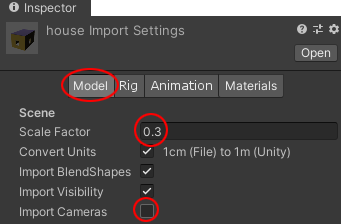
Select the Model tab in the Inspector
Change the Scale Factor to .3
Uncheck Import Cameras and Lights
Hit Apply

Drag your Maya file from the Assets list over to the Hierarchy tab.
Pause the animation until selected
Select your Maya Model in Assets
Switch to the Rig tab in the Inspector
Change Animation Type to Legacy (default was Generic)
Hit Apply
Switch to the Animation tab
Rename Take 001 to a unique name
Hit Apply
Select the Maya Model in the Hierarchy
Uncheck Play Automatically in the Inspector
Add Interaction to the Model
Select the Maya Model in the Hierarchy
Add Component->Physics->Collider
Choose the closest shape.
You may need to Edit the shape using Edit Collider in the Inspector.
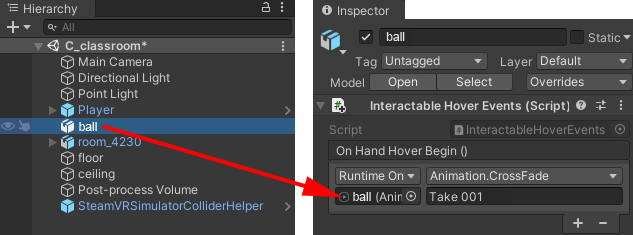
Use Add Component
Search for inter
Select Interactable Button Events
Hit the + under On Trigger Down () in the Inspector
Drag and drop Maya Model from the Hierarchy onto None (obj) in the Inspector
Click the drop down menu reading No function and choose Animation->CrossFade
Type Take 001 (use the new unique name) in the empty box below

You can now test your scene by selecting the Play arrow. Your animated object will start its animation when you grab it with a trigger.


|