|

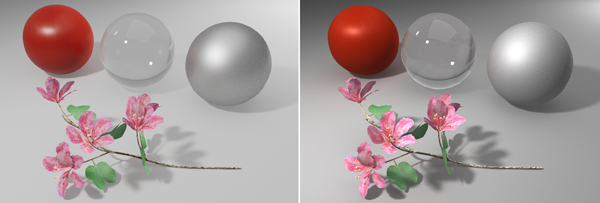
Default Color Management settings RAW Color Management Settings
Maya Arnold RAW Format
Rendering RAW for more dynamic range, better color, highlights and shadows.
Color Management Settings
Select Windows->Settings/Preferences->Preferences
Select Categories Color Management
Check Enable Color Management (default)
Under Color Transform Preferences
Change View: to Raw (default ACE 1.0 SDR-video)
Set Color Space Rules
Under Rule Priority
Select Default
change Input Color Space: to Utility->Raw (default sRGB)
Click Reapply Rules to Scene button
(This will change all your default Base Color textures maps to RAW format.)
Under Output Color Transform Preferences
Check  Apply Output Transform to Renderer (important for batch rendering later) Apply Output Transform to Renderer (important for batch rendering later)
Arnold Render and Light Tutorial

Default Color Management settings RAW Color Management Settings
Create a Scene
Create->NURBS Primitives->Cylinder->
Select Caps: Both
In the Channel Box
Translate Y 1.001
Create->NURBS Primitives->Sphere
In the Channel Box
Translate X 2.5
Translate Y 1
Create->NURBS Primitives->Plane
In the Channel Box
Scale X and Z 20
Add a StandardSurface Shader
Select the Plane
Use the right mouse key over the plane to bring up the marking menu
Select Assign Favorite Material->StandardSurface
(You should see the shader in the attribute editor on the right, switch the tab if you don't.)
Click the Map Button across from Base Color 
Add a Checker texture
Under the texture's Attributes
Change Color 1 to value 0.4
Change Color 2 to value 0.3
Under the place2dTexturetab
Change Repeat UV to 16 (both)
Hit 6 to see the texture
Arnold AiStandardSurface Shader
 Hypershade Hypershade
Select the Materials tab
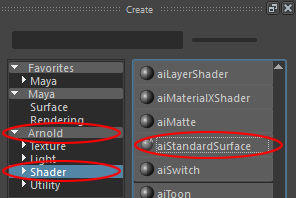
Select Arnold and Shader selection filters
Click on the aiStandardSurface icon to create a new shader ball

Select the sphere and cylinder
Hold right mouse over the aiStandardSurface material
Click Assign Material to Selection
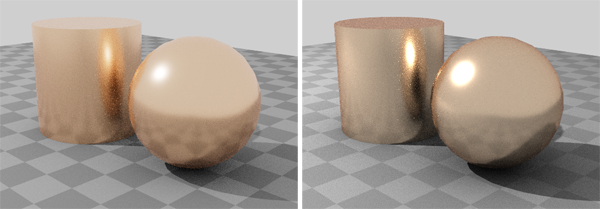
Try a Preset
Click on Presets*
Choose a shader from the list such as Copper and Replace
You can change the aiStandard shader to a Maya Standard Surface shader.
This way you can see a swatch of the shader ball in the Hypershade Window.
Hold down the button next to Type
Select Standard Surface Shader
Arnold Skydome Light
Arnold->Lights->Skydome Light
In the Attribute Editor
Change Samples to 2 (default 1, less grainy)
Uncheck Cast Volumetric Shadow
(This will help speed up the render a bit. Volumetric is for rendering smoke, particles, fog etc.)
Change Camera to 0 (This turns off the camera in the background, default 1)
Arnold Area Light
Arnold->Lights->Area Light
In the Channel Box
Translate X -10, Y 15, Z 10
Rotate X -45, Y -45 (There is a pointer on the light icon, this needs to aim at your objects.)
Scale X .2, Y .2, Z .2 (This will give you sharper shadows.)
In the Attribute Editor
Change Exposure to 10
Set Soft Edge to 1 to improve the edge quality of the shadow. (default 0)
Set Spread lower, the cone of light becomes smaller and brighter. (default 1)
Change Samples to 2 (default 1, less grainy)
Change Shadow Color to a dark gray
Render Settings
Render Settings icon upper right  (Windows->Rendering Editors->Render Settings...) (Windows->Rendering Editors->Render Settings...)
Change Render Using to Arnold Renderer (Arnold is the default)
Presets-> Import Render Settings->Default Settings (This resets all settings)
Under the Common tab:
Choose Image format: tif (default exr, too huge, 32 bit per channel, ignores color mgt.)
Uncheck Dither
Frame.Animation ext: name.ext (name.#.ext for an animation)
Quality settings for Sharpness and less grain
(3 times slower to render.)
Under the Arnold Renderer tab:
Under the Sampling arrow:
Set Camera (AA) to 6 (default 3)
Set Diffuse to 2 (default 2)
Set Specular to 2 (default 2)
Set Transmission to 0 (default 2, use if you are using transmission in your shader)
Set SSS to 0 (default 2, use if you are using Subsurface in your shader)
Set Volume Indirect to 0 (default 2, use for smoke and volume effects)
Under Filter
Change Width to 1 (less blurry, more grainy, default 2)
Under the Ray Depth arrow
Set Total to 2 (should match highest setting below, default 10)
Set Diffuse to 1 (default 1)
Set Specular to 2 (default 1, nicer reflection)
Set Transmission to 0 (default 8)
Set Volume to 0 (default 0)
Set Transparency Depth to 0 (setting for no transparency, 4 good transparency value, default 10)
Render an image to the Render View
Click the Render View icon upper right  to open the window to open the window
Click the Start IPR icon 
Render to Arnold Render View
Arnold->Render
Notice the Arnold RenderView seems sharper than the Maya RenderView window. The final renders are the same.
Render to a File

Switch to the Rendering Module
Select Render->Render Sequence
The image is stored locally on your computer or in your external drive project in the images folder.
Local PC: C:\Users\%USERNAME%\Documents\maya\projects\default\images
Local Mac: /users/$user/Documents/maya/projects/default/images
Single Sided
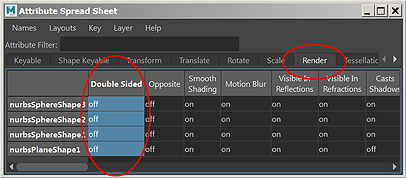
Arnold rendering is very slow because it is calculating reflections, refractions, shadows, and ambient attributes. In order to help speed up the rendering make everything single sided.
Select all the objects in the scene.
Choose Windows->General Editors->Attribute Spread Sheet.
Select the Render Tab.
Click the Double Sided Column.
Input 0 to turn off all selected items at once.

If you do not see Arnold options
Install plug-in
Keep in mind that Autodesk did not develop Arnold; it is a plug-in for Maya, so you may have to enable it in the Plug-in Manager before you can see it as an option in your Render Settings window.
To enable the plug-in: Windows->Settings/Preferences->Plug-in Manager
Check both the Loaded box and the Auto Load box next to mtoa.mll
(Located near the bottom of the list.)

|