|
by Minkyung Choi
With Maya deformers, you can quickly build and animate deformed surfaces with a high level of control. Blend Shapes are universal 3D forms and can be exported to many other animation packages such as Unity.
Switch to the Modeling or the Animation Module for these examples.
 or or 
All these tools work with either Polygons or NURBS
Bake any nCloth or Deformer Animation for Unity
This script is useful for any animation where the objects change shape over time. The animation is converted to an animated blendshape that can be used in Unity.
Download this MEL python script
AnimationToBlendShapes.py (under development)
In Maya
Open the Script Editor (lower right) 
File->Open Script... from the Script Editor menu
Find AnimationToBlendShapes.py file
Select your object with a cached nCloth or an animated Deformer (see below)
In the Script Editor make sure you have the AnimationToBlendShapes.py tab selected
Hit the Play arrow in the Script Editor menu.
Input 10 followed by OK
This will grab every 10 frames from your animation to make an animated blendShape.
Save to Unity Assets
Blend Shape works with Unity
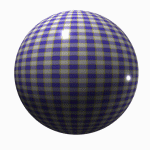
Blend Shape is different from other deformers. It is specifically designed to perform morphing tasks, and it has a separate slider editor.
Blend shape is especially useful for facial animation. In this type of animation, a group set shapes such as certain phonemes or facial expressions need to be readily accessible, editable and blendable.
Create two spheres. Create->Polygon Primitives->Sphere
Change the second sphere shape by sculpting points
Change the name of the second sphere to something that describes the motion, ie. blob.
Select the second sphere (target), use shift to select the first sphere (base) too.
(The order is important)
Choose Deform->Blend Shape
(This adds blend shapes options in the channel editor and connects the target.)
You may have as many target shapes as you like. Use Deform->Blend Shape->Add if you would like to add additional shapes.
You may delete the second Sphere.
Select the sphere
Open blendShape1 in the Channel Box
Animate the channel named after the second sphere between 0 and 1
You may also select Windows->Animation Editors->Shape Editor
An editor opens with a target slider. A blend shape node is created and the target slider is an attribute of that node
Cluster
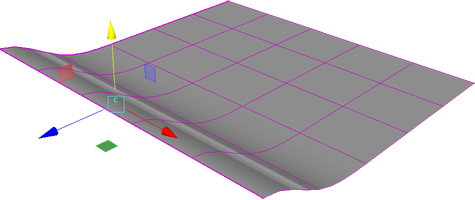
Add a node to manipulate translate, rotate, scale for a group of component points as a group.
Select the CVs or vertices you would like to group together.
Select Deform->Cluster
Use Windows->General Editors->Hypergraph: Hierarchy to select the cluster.
or Windows->Outliner
Curve Warp
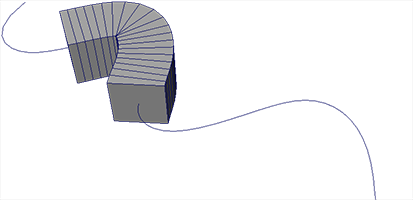
Curve warp is only available in the Modeling Module.

Use a curve warp when you want to deform a polygon mesh along the length of a curve. Any modifications you make to the curve will affect the deformed object.
Select the mesh you would like to deform, and use shift to select the curve.
Select Deform->Curve Warp
Play with the Offset settings in the Channel Box to slide the mesh along the curve
Delta Mush
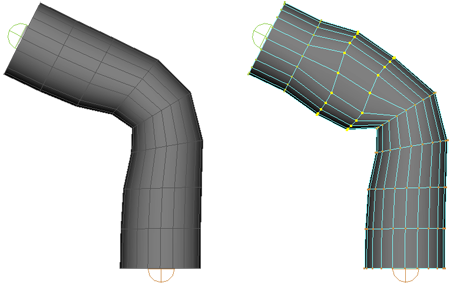
The first example has no Delta Mush, the second example uses Delta Mush on the selected vertices.
Delta Mush works with skinned IK joints. Use the Rigging Module.

Create a cylinder with enough divisions to bend along the length.
Use Skeleton->Create Joints to create 2 bones along the length.
Select the cylinder and the skeleton, choose Skin->Bind Skin.
Select the vertices you would like to deform, use Deform->Delta Mush
Select a joint from the skeleton and rotate it, notice the bulge effect.
Tension
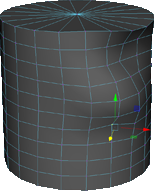
The Tension deformer simulates surface tension without squashing and stretching the surface too much. It uses the connectivity between the mesh vertices to preserve the (relative) lengths between them.
Select the object or points of the mesh you would like to deform. It makes most sense to use this with Poly or Linear NURBS.
Select Deform->Tension
Right click and select the mesh vertices and drag them around.
Lattice
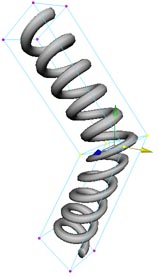
This allows you control the deformation of complicated objects with fewer control points than deforming object directly. Maya creates Lattices around the object and when you transform the influence lattice, the object inside it gets deformed.
Create->Polygon Primitives-> Helix->
coils 10, height 10, width 2, radius 0.2
Select the helix and create Lattice
Deform->Lattice->
divisions: 2, 3, 2
Select the Lattice,
Hold down the right mouse button to bring up a mini menu, choose Lattice Point.
You can scale, rotate or move the points in order to deform the object into various shapes.
You can also skin the lattice to an IK skeleton.
You may animate by using the s key or cluster lattice points to add an animatable node.
Open Windows-> General Editors-> Hypergraph: Hierarchy or Windows->Outliner to view the 2 components of the lattice. These may also be manipulated for various effects.
Wrap
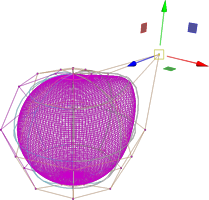
Use a low resolution object to manipulate a higher resolution object.
Create->NURBS Primitives->Sphere (default settings) low resolution
Create->Polygon Primitives->Sphere
Select the high-res Poly sphere, and then select the low-res sphere.
Select Deform->Wrap
Select the Poly sphere under wrap1 in the Channel Box
Set Auto Weight Threshold to off
Shrink Wrap
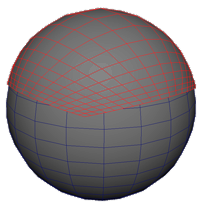
Shrinkwrap deformers let you project a poly object onto the surface of another object. Every shrinkwrap deformation contains the the wrapper (the object that is deformed) and the target (the object around which the wrapper is shrunk).
Create->Polygon Primitives->Sphere
Create->Polygon Primitives->Plane, move the plane above the sphere.
First select the plane (object that will be deformed) and then the sphere (object around which the wrapper is shrunk).
Deform->Shrink Wrap
Note:If you transform or deform the target after you have applied the shrinkwrap deformation, the shape of the wrapper is also altered
Wire tool
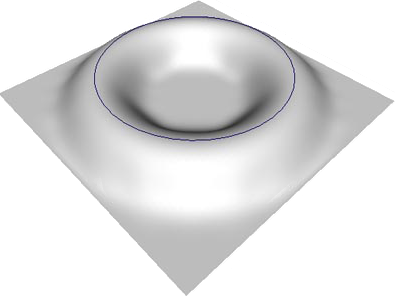
Wire deformation works with an influence wire and a base wire, like Lattice deformation. The deformation occurs according to the relative distance between the two wires. Useful for creating facial expressions
Create->NURBS Primitives->Plane
Width 3, Length 3
U patches 16, V patches 16
Create->NURBS Primitives->Circle
Deform-> Wire (default setting)
Maya asks you to select shape(s) to deform:
Select the plane and press Enter
Select the circle press Enter
The circle is now called a wire. Note that a hidden duplicate of the wire, called the base wire, has been created as well.
Translate up the wire as shown below, then try moving up the base wire. As the distance between the two curves decreases, so does the intensity of the Wire deformation.
To pick up the base wire, go to Windows->General Editors->Hypergraph: Hierarchy or Windows->Outliner
There are option to manipulate in the Channel box for the plane.
Nonlinear

These are simple functions, but they're remarkably effective in creating their intended animations and deformations.
Select Deform->Nonlinear->
Bend - bends an object along a circular arc.
Flare - flares and tapers an object.
Sine - curves an object into sine waves.
Squash - stretches and squashes an object.
Twist - twists an object.
Wave - creates circular ripples on an object.
Soft Modification
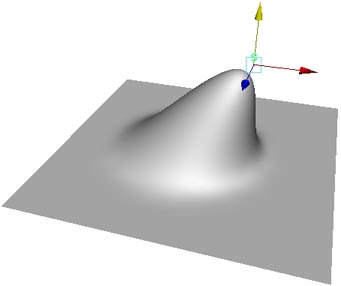
Create a shape larger than 6 units
Select Deform->Soft Modification
Move the softMod1Handle
Sculpt
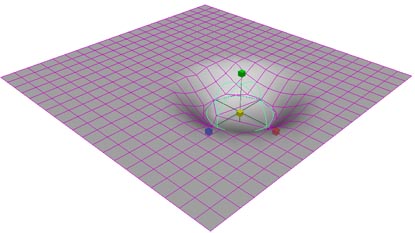
Sculpt deformation uses a sphere as a sculpting tool to make round or flat ring-shaped deformations.
Create->Polygon Primitives-> Plane->
Scale up the plane
Deform->Sculpt
Open Windows->General Editor->Hypergraph: Hierarchy or Windows->Outliner to view the 2 components of the sculpt deformer. You may want to move, rotate or scale both elements together.
Jiggle
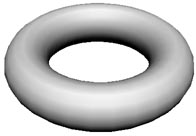
Think jello, this is not so effective, because it is difficult to control.
First, animate a torus rotating
Deform->Jiggle
Use the Channel box:
stiffness .1
force on tangent .1
Play the animation
Point on Curve
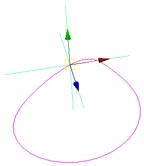
Right mouse over a curve to add a curve point
Deform->Point on Curve
This add a locator which you can move, rotate or scale to manipulate part of the curve.
Texture
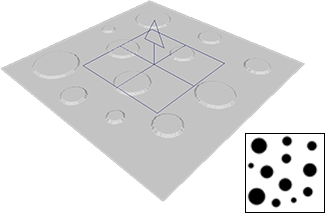
Texture deformers let you deform objects with a texture pattern. The are useful to quickly get the procedural noise of a shape or to preview a displacement map
Create NURBS->Primitives->Plane
Width 3, Length 3
Add enough subdivisions so you get a highly defined deformation
Deform->Texture
Use the Attribute Editor to add a Texture map.

|