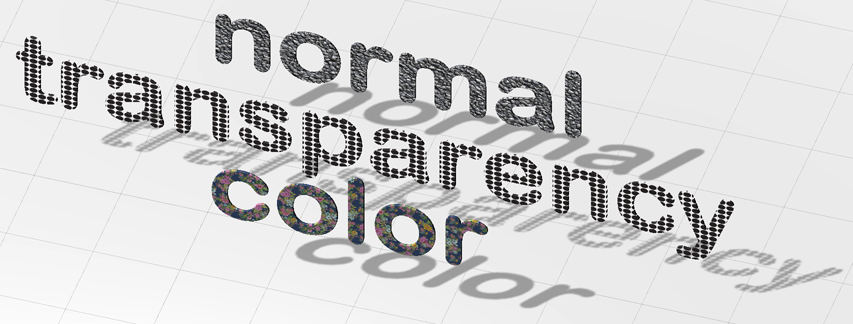
|
In Unity
Add some primitives
Add GameObject->3D Object->Cube etc.
Add some materials
Select Assets->Create->Material.
Double click the material in Assets below.
Drag and drop a material onto a primitive
Albedo Color Maps
Make some 256x256 pixel tiff files in Photoshop and save the files into your Assets folder.
Select Material you would like to map.
Drag the map from Assets onto the Albedo square in the Inspector.
Take the blur out of all imported maps.
Select the map in Assets (This will work with multiple selections)
Select Filter Mode Point (No Filter)
Hit Apply
Transparency Maps
In Unity
Select a Material you would like to map in Assets.
Drag the transparency map from Assets onto the Albedo square in the Inspector.
Change Surface Type to Transparent
(Transparent does not cast shadows, non URP renderers used cut-out which did cast shadows with transparency maps.)
Change Tiling to a higher number for repeated texture.
Notice your object is single sided, you will need to model the inside and outside in Maya.
Edit->Mesh Extrude in Maya is great for this.
TIF Transparency Maps
In Photoshop
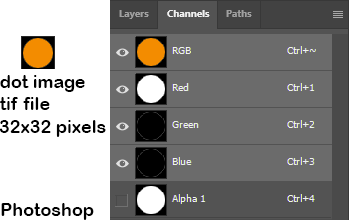
Make a 32x32 pixel dot map with an Alpha channel in Photoshop.
Use the Elliptical Marquee tool to select a circle 
Use Select->Save Selection... The defaults are good
Select the Window->Channels window
Select the Alpha1 channel
Paint the transparent sections black, opaque white, and translucent gray.
Save the file into your Unity Assets folder as a tiff.
PNG or TIFF Transparency Maps
In Photoshop
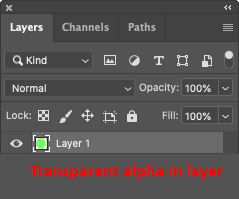
PNG transparency maps will have transparency in the Layer, with no Background layer.
How to create a Normal Map (bump)
In Photoshop
Open an image file.
Select Filter->3D->Generate Normal Map...
Save the file as a new name into your Unity Assets folder.
In Unity
Select Material you would like to map in Assets.
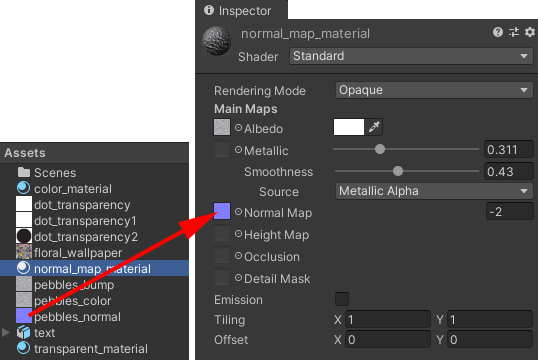
Drag your normal map from you Assets onto the Normal Map in the Inspector
Click the Fix Now button
Adjust the bumpiness of the map to the right.
AutoDesk Interactive Material
Select Assets->Create->Material.
In the Inspector, Change the Shader to:
Universal Render Pipeline>AutoDesk Interactive>AutoDesk Interactive Transparent
This shader includes options for Metalness and Roughness.
All values seem to be controlled with maps.
Select UseColorMap
Drag and drop a ColorMap with an alpha channel or layer to BaseColor
Select UseOpacityMap
Change UVScale for texture repeats.
This Material works well with Substance Painter.
Import a new Skybox
Choose the Asset Store tab next to the Scene window (or Window Asset Store)
Type skybox in the search bar, Select Free Assets
select Download and Import
Put the main view window back to Scene
Choose Window->Rendering->Lighting Settings
Click the  to change the Skybox Material to the skybox you imported. to change the Skybox Material to the skybox you imported.
You can also make your own.
Glass and Reflection
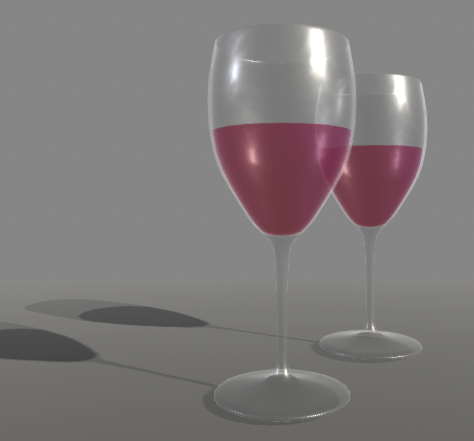
Select Assets->Create->Material.
Double click the material in Assets below.
Change Shader to Autodesk Interactive in the Inspector
Change Rendering Mode to Transparent
Change the Albedo color to Value 7 and Alpha to 15 transparent
Increase Metalic (reflectivity)
Increase Roughness (shiny dull)
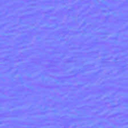
Drag a normal map from your Assets onto the Normal Map in the Inspector
Click the Fix Now button
Adjust the bumpiness of the map to the right, keep low
Drag and drop the material onto the model.
Reflection Probe for shiny glass and chrome
(The class template already has a reflection probe.)
Select GameObject->Light->Reflection Probe
Change the Position to 0,0,0 in the Inspector
Make sure your objects are within the cube area. Use this editor to adjust. 
Change the Type to Realtime (default Baked)
Change the Clear Flags and Background color to match your camera
Increase Smoothness or Metalic on Materials to change the reflectivity
Fix Shadows and Lighting
These settings can effect performance.
Quality
Edit->Project Settings...
Select Quality
Locate Render Pipeline Asset URP-HighFidelity (Universal Render Pipeline Asset) (This is the default for URP)
Right click on URP-HighFidelity (Universal Render Pipeline Asset)
Select Properties...
Decrease Max Distance to 30 (default 150) This what causes low resolution shadows!
Lights
Select your Directional Light
Turn on Shadows
Turn down Strength to lighten the shadow color, try .5 (default 1)
Change Render Mode to Important Do this to main lights, if you have a scene with many lights you will need this. (default auto)

|
