|

Bouncing Ball
Set up your Maya options for animation
Move the time slider over to frame 1 at the bottom of the screen.

Change 24 fps to 30 fps over to the right on the timeslider.

Set the end time of the playback range to 150 frames on the timeslider

Choose Create->Polygon Primitive->Sphere
Use the channel box on the right side of the screen and input: Translate Y 4, Rotate Z 5
Switch over to the FX section, choose from upper left, status line.

Select the sphere
Choose nCloth->Create nCloth
Play the animation. Notice how soft the sphere is.
Another way to bounce a ball with Maya Legacy Dynamics, this will transfer to Unity:
Nucleus
Select the sphere
Use the Attribute Editor on the right (ctrl a)
Choose the nucleus1 tab (You may need to arrow over.)
The nucleus is the same for all objects, it creates an environment with gravity etc.
Under Ground Plane, select Use Plane
Run your simulation again
Make the ball bouncy
Select the nCloth
Use the Attribute Editor
Select Presets*
Select solidRubber
Run you simulation again.
Tablecloth

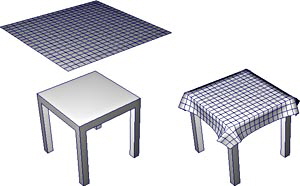
Make a tablecloth out of a plane place above the table.
Create->Polygon Primitive->Plane->
Width and Height 6, 6
Width and Height Divisions 20, 20
Place the cloth above the table in the Y Axis.
Switch over to the FX section, choose from upper left, status line.

Select the table or a cube
Choose nCloth->Create Passive Collider
Select the tablecloth
Choose nCloth->Create nCloth
Set up your Maya options for animation
Move the time slider over to frame 1 at the bottom of the screen.

Change 24 fps to 30 fps over to the right on the timeslider.

Set the end time of the playback range to 150 frames on the timeslider

Play the animation.
Nucleus
Select the tablecloth
Use the Attribute Editor on the right
Choose the nucleus1 tab
Open Scale Attributes
Input Space Scale 5
This will scale the environment closer to reality, right now it is too small for the objects, default 1 grid unit = 1 meter. (It is not a good idea to change the default grid unit, this will effect lighting and dynamics in adverse ways.) Options like gravity will function more realistically. Your tablecloth was 6 meters wide (19.5 feet), it is now similar to 1.2 meters (4 feet). Notice the animation slowed down, you may need to increase your time slider.
Keep the tablecloth on the table
Select the tablecloth
Under Collisions
change Stickiness to 10 (default 0, you may input values above the input slider.)
Run you simulation again
Make the cloth less stiff
Select the tablecloth
Under Dynamic Properties
change Bend Resistance to 0, (default .1)
Run you simulation again
Use the simulation to model
Run you simulation again, stop it towards the end
Select the tablecloth
Choose Edit->Duplicate
The copy will not have any dynamics
(See below to bring the model into Unity.)
Curtain
Use this similar tutorial for Unity

Switch over to the Modeling section, choose from upper left, status line.

Create two different snakey curves in the top view.
Create->Curve Tools->CV Curve Tool-> Curve degree 3 Cubic Curve degree 3 Cubic
Move the curves apart from each other.
Select the curves.
Select Surfaces->Loft->
Choose Output geometry: Polygons
Choose Quads
Choose Tessellation method: General
Change U type to: Per span # of iso params
Change V type to: Per span # of iso params
Input Number U: 3 (If this is too jaggy, increase)
Input Number V: 3
Click Loft
Add a backside to the curtains
Choose EditMesh->Extrude
Pull out the blue arrow .1 for thickness and double sided geometry. (for Unity)
Add nCloth dynamics
Switch to theFX Module

Select the curtain
Choose nCloth->Create nCloth
Constrain the curtain to an imaginary curtain rod
Select the top row of vertices
Select nConstraint->Transform Constraint
Add wind
Select the curtain
Bring up the Attribute Editor
Arrow over to the nucleus1 tab
Under Gravity and Wind
Change Wind Speed to 4
Change Wind Direction to 1, 0, 1
Use the simulation to model
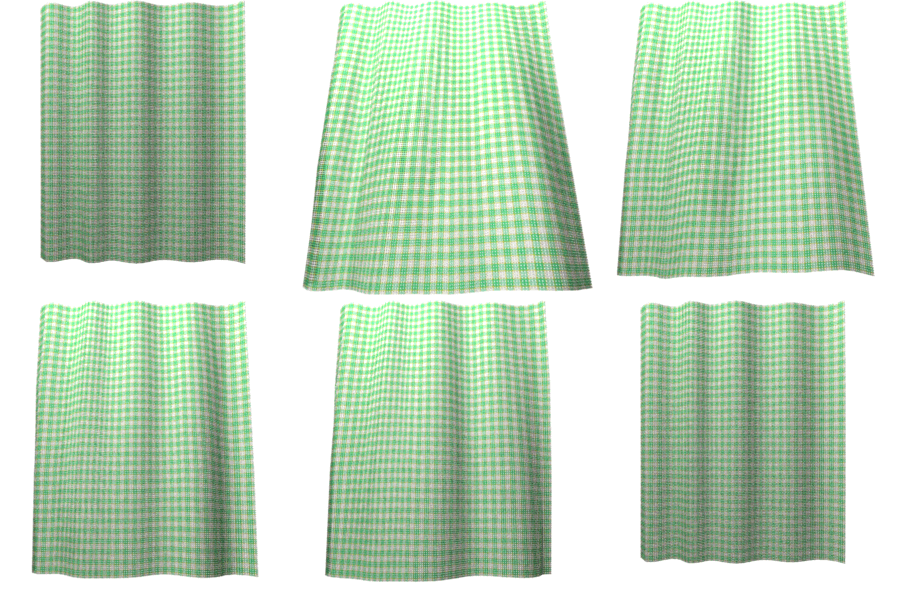
Make at least 3 copies from various frames of the animation:
Hit the play arrow on the time slider to play and stop when you like a model. 
Select the curtain
Choose Edit->Duplicate Ctrl d
Choose Display->Hide Selection Ctrl h
The copies will not have any dynamics. Do this 3 times
Delete the original nCloth nucleus and curves
Use Display->Show All to show the hidden copies
Keep the 3 duplicated curtain meshes
1 will be the base shape, name this curtain
Name the other 2 curtains curtain1 and curtain2
Remove invisible nCloth nodes that mess you up in Unity
Do this before animating if you are making a blend shape for Unity.
Select File->Optimize Scene Size->
Select Remove: Unknown nodes
Or if that did not work when you bring the files to Unity, try this:
Select one shape at a time
Select Windows->General Editors->Hypergraph: Connections
Select the light grey node
Hit delete
Close the Connection window
Repeat for each shape
Blend Shape
Switch to the Modeling or the Animation Module
 or or 
Select the first curtain (base)
Choose Deform->Blend Shape
(This adds blend shapes options in the channel editor)
Select curtain1 (target), use shift to select the first curtain(base) too.
(The order is important)
Choose Deform-> Blend Shape->Add lower menu item
Do this again for curtain2
Delete the target curtains.
Animate the Blend Shape
Select the curtain
Open blendShape1 in the Channel Box
Animate the channel named after the second curtain between 0 and 1
The time slider should be the length of your animation.
Choose File->Save As select Desktop->Maya_Tutorial->Assets (Or the name of your Unity Project folder.) Maya scene files will transfer straight into your Unity file.
Any animated items should be separate Maya files. It will be easier to manage
Cache nCloth
This will convert the nCloth into frame by frame shape files. This way you do not need to play the entire simulation to see a particular frame.
Create an Ncloth Simulation
Change the end time range on the timeslider
Select your nCloth object
nCache->Create New Cache->nObject->
The Cache directory will be saved to your default project.
Bake any nCloth or Deformer Animation for Unity
This script is useful for any animation where the objects change shape over time. The animation is converted to an animated blendshape that can be used in Unity.
Download this MEL python script
AnimationToBlendShapes.py (under development)
In Maya
Open the Script Editor (lower right) 
File->Open Script... from the Script Editor menu
Find AnimationToBlendShapes.py file
Select your object with a cached nCloth or an animated Deformer (see below)
In the Script Editor make sure you have the AnimationToBlendShapes.py tab selected
Hit the Play arrow in the Script Editor menu.
Input 10 followed by OK
This will grab every 10 frames from your animation to make an animated blendShape.
Delete any ncloth nucleus, nrigid, original ncloth object
Do this before animating if you are making a blend shape for Unity.
Select File->Optimize Scene Size->
Select Remove: Unknown nodes
Or if that did not work when you bring the files to Unity, try this:
Select one shape at a time
Select Windows->General Editors->Hypergraph: Connections
Select the light grey node
Hit delete
Close the Connection window
Repeat for each shape
Save to Unity Assets

|